
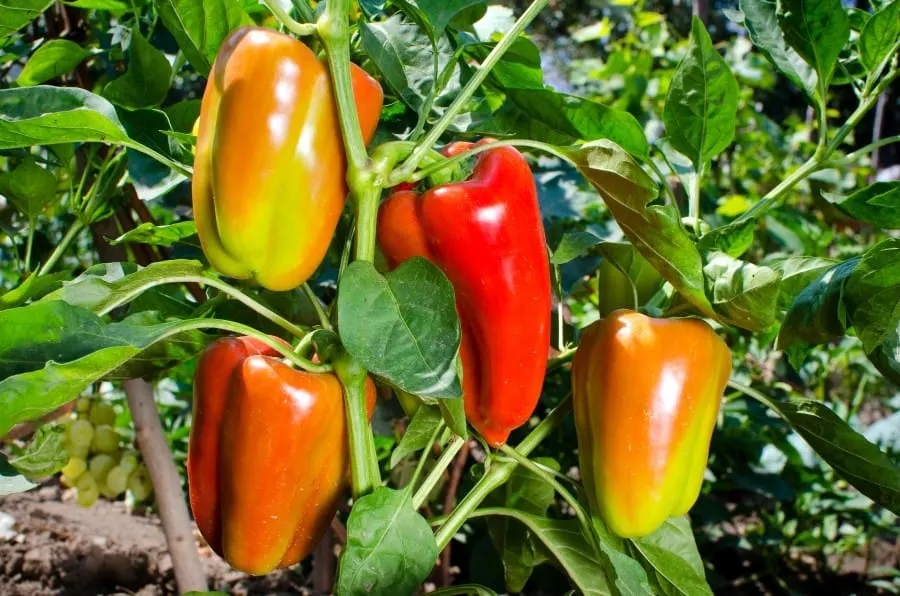
Peppers are some of the world’s most sought-after salad items and cooking ingredients. If you’re a pepper head like we are, then you might consider growing your own peppers at home, especially if they tend to be a consistent item in your grocery list. Luckily, they’re a plant that can grow in containers, so you can start a pepper garden even if you live in an apartment!
To grow peppers in containers, you need to grow their seedlings on a seed tray. Transplant your seedlings into 3-inch pots when they have their first true leaves. Finally, harden them three to four weeks after germination and transplant them into 1.5-gallon (5 liter) planters.
In this article, we’ll take you through a detailed guide on how to grow peppers in containers. Let’s begin.

Benefits of Growing Peppers in Containers
You don’t need a massive garden to grow delicious, fresh peppers. You’re about to learn why so many people prefer homegrown Serranos, Poblanos, Fushimi peppers, and many other varieties over anything they could find in the store.
Below is a handful of benefits of growing peppers in containers:
- You don’t need to worry about birds or other pests eating the seeds before they grow into peppers.
- Growing peppers in a container prevents them from tangling with roots or competing for nutrients with other seeds.
- It’s the easiest way for beginners to learn how to grow peppers (and many other vegetables) at home.
- You can move the peppers around without damaging their roots.
- Finally, you can decide where you want the peppers to grow when they’re sprouting. You won’t have to transplant them from the ground, which is much harder than removing each seedling from an egg crate or a 5-gallon container.
Common and Easy Types of Peppers to Grow in Containers
Peppers come in many varieties, but not all of them are conducive to growing in containers or pots. Here are some common peppers that grow well in containers:
- Poblanos
- Bulgarian Carrot Peppers
- Fushimi Peppers
- Jalapeños
- Chiles de Arbol
- Cayenne Peppers
- Habaneros
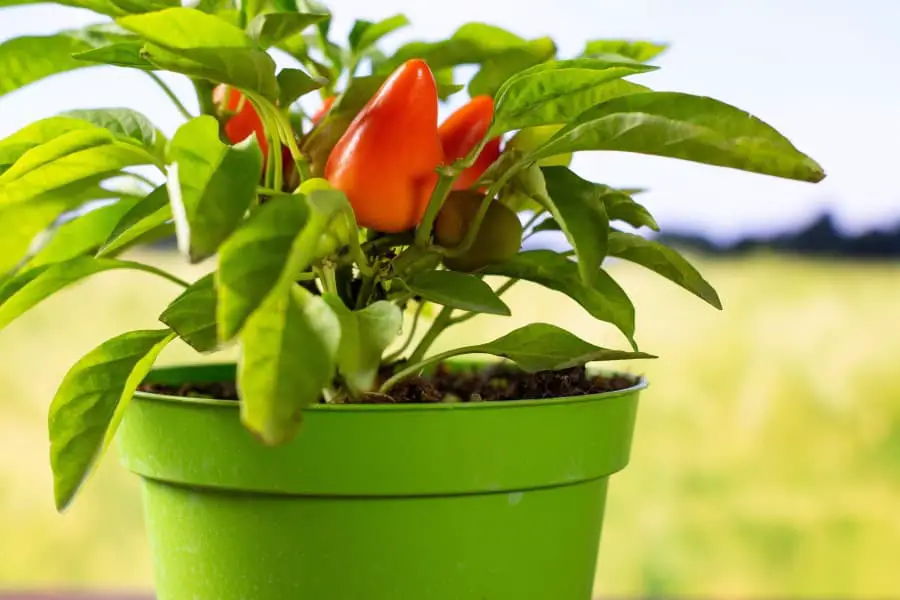
Jalapeños are small and easy to grow in containers since they don’t need a lot of room to grow. On the other hand, Bell peppers require a bit more room, but you can still plant quite a few of them in containers. Bell peppers come in a rainbow of green, red, yellow, orange, and purple colors. All these varieties can easily grow in containers.
The green variety is the most common and is an unripe version of its colored counterparts. It is crunchy and a tad bitter, and this is why most people tend to prefer it cooked, but it is also enjoyed raw as a crunchy snack or in salads.
Yellow peppers are sweet and fruity. Whether plain or cooked, they are delicious. The orange Bell pepper variety is less sweet than the yellow type. It adds a splash of beautiful color to salads, but you can also cook it for more flavorful and healthy meals.
If you love your peppers super sweet, go for red Bell peppers. They are juicy and nectarous when fully ripe. They also have more nutrition to offer than their green, yellow, and orange peers do. The red Bell pepper is an excellent source of the carotenoid lycopene, which has antioxidant effects and can lower cancer risks.
Serrano peppers are another popular variety and one you can grow in containers. Alongside Jalapeños, they are excellent in salsas, salads, and sides for a plethora of dishes. Both peppers are often consumed when they are vibrantly green and they are filled with unparalleled flavor.
Devil’s Tongue peppers are another growing option that were recently discovered while a man was attempting to grow Habaneros, according to Sandia Seed. You can quickly grow them in small containers for a spicy addition to any dish. Pair them with eggs in the morning, dice them for a party salsa, or enjoy them raw.

Tips on How to Grow Pepper Plants in Containers
- Start with small slots for each seed to grow until you see a stem spring up from the soil.
- Allow enough sunlight to penetrate the dirt, but not too much to roast the seeds.
- Remember that air quality, temperature, water quantity, and other elements will impact the flavor and freshness.
- Most peppers don’t need too much space to grow but remember that the seeds will overtake one another to gain the most nutrients. Placing all of the seeds too closely will limit the number of peppers that you can harvest.
- Don’t plant too many different types of peppers near each other, especially if one variety is sweeter than the other. If planted too close, your sweeter peppers, like Bell peppers, might taste a bit spicy, and your spicier varieties like Jalapeños might end up tasting a bit sweeter. They should be separated for maximum water retention. All peppers have slightly varying requirements.
Most first-time pepper growers may find the aspect of growing their peppers from seed intimidating. It is, however, very easy if you learn the correct process. Purchasing your pepper seeds will be likely also be cheaper than buying potted pepper plants.
If you care for your seedlings properly, you can have lots of sweet, spicy, and mild peppers in your home in a matter of weeks. Should you have room for a couple of potted pepper plants, you will reap a harvest of some dozens of peppers in no time.
Start Your Capsicum Seed Nursery
You should find the most common pepper varieties in most local garden stores. Most pepper seeds are round and flat. They can have a cream, yellow or white color. Some seeds require processes such as soaking, nicking, and cold stratification when starting a seed garden.
Bell peppers are some of the easiest seeds to grow. If you’re a beginner, they’re an excellent choice. Simply put them in your soil, straight from the packet, and they will germinate. Some supplies that you need to start your seedbed off include:
- Seed variety of choice
- Water
- Peat pellets or starting soil for seeds
- Seedling trays
If you are going to use peat pellets, you will need to moisten them first. Seed pellets are a great alternative to the seedling pot, especially for the gardener that wants to start an indoor garden transplant. The growing medium in peat pellets could be a combination of coconut coir and peat.
On purchase, seed pellets are dehydrated, so you will need to rehydrate them for use. To moisten them, arrange them on the seed tray, then fill your tray with an inch of water. Set them aside and allow them to absorb the water and expand to a size of three inches.
This process should take about half an hour to an hour. Empty the leftover water on the tray before planting your seeds. After hydration, your seed pellets will keep moisture if you cover them with a plastic wrap layer. You will not need to add more water to the seedbed until your seeds have sprouted.
Here are the steps to planting your pepper in a nursery:
- Fill your seed tray’s cells with moist starting soil or rehydrated seed pellets. Place the cells on the trays.
- You can plant your seeds by placing one seed per cell. This process works well for brand new hybrid seeds. These seeds are expensive, so you want to plant them in optimum conditions to ensure a high germination rate.
- If you are planting seeds from your older crop of aging seeds, place two or three seeds in each cell. You can also plant multiple seeds in a cell if you want to plant many seeds at a go by hand. This process will save you a lot of time and effort.
- When planting your Bell pepper seeds, you need to make a depression in the soil or seed pellet larger than your seed. The rule of thumb for Sweet pepper seeds is half an inch. When planting your seeds, roll them off your fingers to separate them first. Place them in the center of your cell. After you have placed the seeds in their holes, pinch the holes shut.
- If you have multiple seeds in each cell, gently press the seeds down, and then add a layer of soil or moist peat pellet on top. Avoid compacting the soil and be very gentle.
- If your soil is not moist, water it. Add the water from the bottom of the seedling tray to not move or disturb your seeds. Pour your water from the drainage holes, and then dump any leftover water after 15 minutes.
- To keep your soil warm, place a plastic lid on top of your seed tray. The lid will keep the soil and seeds warm and encourage germination.
- Move your seed tray to a warm location. In gardening, warmth does not imply the amount of heat in the air but rather the soil’s warmth. Most plants in their young age might not dislike cold air, but they will not grow if their roots freeze in damp soil.
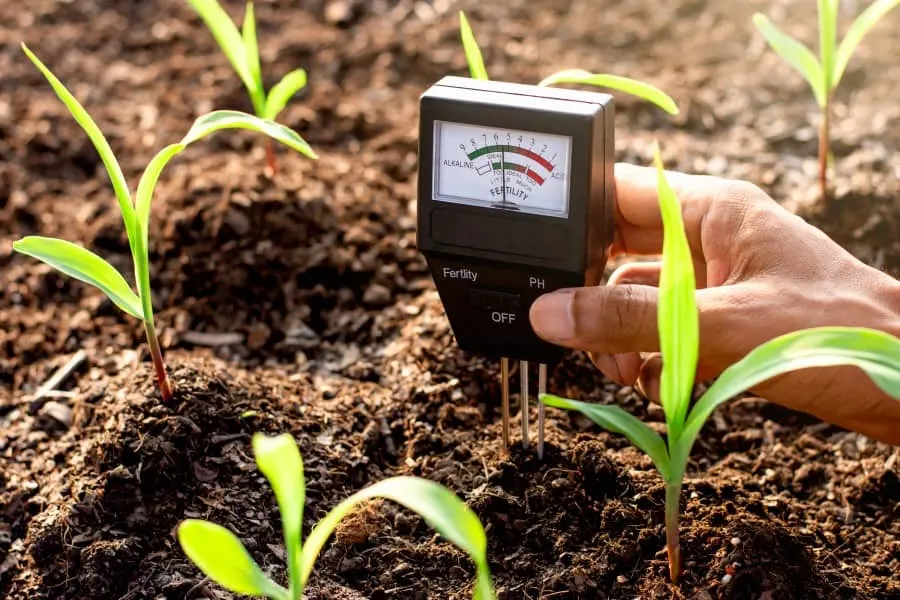
Gardening favorites like eggplant, tomatoes, and peppers need hotbeds if you grow them indoors. In contrast, cold crops like salad greens and peas will grow well in cool or cold conditions. To ensure that your peppers sprout, keep their soil temperature at 68-79 degrees Fahrenheit (20 -26 degrees Celsius).
You can measure the seed cell temperature via thermometer. To ensure steady optimum temperatures, measure your seed tray’s temperature a few times each day until you have established consistency.
I you are planting your seeds in cold weather, warm your soil or seed pellets first, by using a heat mat if needed. If you do not have a heat mat, you can run a heater nearby or place your seeds by a heater or radiator. That said, be very careful not to dry out your potting mix or kill your seeds with high heat.

Care for Your Pepper Seedlings
If provided the right care, your seeds will take about a week or two to germinate. They could, however, take longer, so exercise patience. Some can take a month to sprout if the soil temperature is too cold.
On germination, your seedlings will have pointy and narrow seed leaves. At first, they will only have two of these beauties. The seedling’s leaves will then give way to true leaves that resemble Sweet pepper leaves. True leaves form within a week of the seed leaves’ formation.
So how should you care for your pepper babies? Capsicum seedlings are tiny champs and do not need a lot of care to grow. Below are some of the best care tips for sweet, mild, and spicy pepper seedlings.
Water
Your pepper plants need water. That said, you should not water them so much that their soil turns into a soggy mess. You only need enough water to moisten the soil. You should allow the top layer of the soil to dry out before watering the seedlings.
Water them before the lower layer dries out. Should you put too much water in your cells, empty the excess water on the tray. Turn on a low fan over your seed trays to provide air circulation, which will pull away moisture from your seedbeds.
Light
Seeds do not require light to germinate, but they will need some sunlight after germination. A lack of light will make them weak. A sure sign of insufficient light is leggy, floppy seeds. The weak, almost translucent stems will make headway for the nearest window.
If you want to keep your pepper seeds robust:
- Use a light if you cannot provide them with ample daylight.
- If the location does not have sufficient sunlight, hang a grow light over the seed tray.
- Place your grow light a few inches above the seedlings when they germinate.
Most gardeners often overestimate the quality and the quantity of light they give to their seedlings, especially at the seedling stage. If you give your seeds insufficient light, you will have long germination timelines and low seedling survival rates. Some of the most common lighting mistakes you have to watch out for are low levels of light, i.e.:
- Poor coverage of light where the gardener places the light source too far from the seedlings: If T5 fluorescents are your source of light, place them at least 6 inches away from your seedlings. If you use LED grow lights, place them a maximum of 12 inches from the seedlings.
- Not leaving the light on long enough: You should time your light to give 14-16 hours of light to your pepper younglings each day.
Move Your Seedlings to Transition Pots
If you want healthy and big pepper plants that will produce fantastic fruits, you need to take care of your seedlings during their infancy stage. When they are past their two-week stage and have their first set of true leaves, they will need more space to flourish.
The seed cell is too small to meet the demands of the growing pepper plant. This stage is the perfect point to transition them to bigger pots or cell trays. This will be the first of your two transplanting processes on your way to a heavy pepper harvest.
Moving your plants to a large container will encourage superior root system growth and more leafy plants. In the small cell, your tiny plant’s roots will have no expansion plates, so they will tangle and affect your seedling’s health.
To keep your plant’s roots system from becoming root bound, and making transplanting much more difficult, place your seedlings into transition pots on time. If you keep your plants too long in the seed tray, their growth will stunt.
You will have tall, stalky pepper plants bereft of leaves because of the lack of nutrition and root strength. The size of your final planter is key to your pepper plant’s maximum growth achievement.
Pro tip: Depending on the growth conditions, some pepper plants may look too small for the transition by week three or four after germination. To ensure that your seedlings are ready for their transition pots, loosen the soil around the root system.
If there is a solid root ball underneath it that grows down to the cell’s bottom, then your plants are ready for transplanting. Move your seedlings to larger pots, just before their roots coil around the cell.
Transition Resources
- 3-inch pots
- Potting soil
- Shears
- Screwdriver
- Water
Three-inch pots are the best size up from the seedling tray’s tiny cells because they will hold more water and soil, but not be too big. They will also fit into the starting trays. Some gardeners may choose to transplant their seedlings into the last pot at this point. However, the best practice is to transition them gradually to ensure that the plant is hardy for outdoor life.
Use pruning shears to cut away at any extra sprouts that may grow on the plant’s stem.
At the three-to-four-week mark after germination, your plants will require more nutrition. This is a good time to transition them into potting soil rich in nutrients. You also need to add a fertilizer that encourages growth and structure.
Should you fail to add nutrition, your seedlings will have curling, yellow leaves, and weak stems.
Pro tips:
- As you transition your plants to larger pots, transition the fertilizer dosage as well.
- Do not give your one-month-old babies a full fertilizer dosage all at once.
- Start them off with a dilute dose, then add on the strength as they become stronger.
Use a natural organic enriched fertilizer as much as possible. Most commercial chemical fertilizer can be very harsh and can burn your little plants. The beauty of organic fertilizer is that you can make yours at home, from your kitchen and gardening waste!
How to Transition Your Pepper Plants to Larger Pots
- To make the transplanting process easy, prep all your containers first. Arrange them on a tray and fill them with your soil mix to the brim. Hydrate your soil with a little water but do not make it a soggy mix.
- Soak the filled pots from below using two liters of warm water. Warm water seeps up the soil mix faster than cold water does. Let them sit in the water for two hours. Moist soil will lessen the seedling’s transplant shock.
- Use your screwdriver’s handle to make a big hole in the middle of your transition pot’s soil mix. Then use the screwdriver’s sharp end to gently lift your seedling’s root ball from the cell. Do not pull on the stem of the plant as that might cause damage.
- Should your roots be too tangled, roll them gently on your hand to loosen them. This process will help the plant’s transition to their new environment easier. If you have more than one plant in each cell, pry them all out with the screwdriver edge, and then separate them before transplanting them.
- Place the seedling into the new potting mix and pinch the soil firmly around it. Place a cover on top of the new plants and allow them to thrive in optimum conditions in these pots for a minimum of five weeks.
Transplant Your Pepper Seedlings into Larger Containers
After a month or so, your peppers will be in the prime of their youth and ready for more space. The weather should also warm up with early spring. It is time to let your seedlings into their final homes.
Pro tip: If you plan on keeping your peppers outside, do not move your plants to the outdoors while it is cold. Peppers dislike freezing weather. If the cold does not wipe them all out, it could significantly stunt their growth. Wait until all the frost is gone and the soil is warm enough for optimum growth.
Harden off the Pepper Seedlings for the Outdoors
Before you can transplant your seedlings to their large homes and move them outside, you need to harden them off first. What is hardening? Hardening prepares your seedlings for outdoor conditions. While kept indoors, they have not been exposed to the sun, wind, or rain, so they need to be hardened off so that they don’t suffer from shock when you move them outside.
These are the conditions that will challenge them out in the garden or patio. To harden your little champs, place them outside in the shade for a few hours each day. A screen room is a perfect hardening spot if you have one. Start with 20 minutes of exposure a day.
Increase their time in the sun exponentially. Should they droop, bring them back inside. Water them also if the soil dries out. They should be tough enough for the outdoors after a week.
Transplanting Your Pepper Seedlings into their Final Pots/Containers
- First, choose a location that receives full sun. Most peppers are heat-loving plants, so shady spots will produce smaller peppers. Cold spots also leave the plants exposed to pests such as garden slugs. You can place their pots on your deck, patio or on a windowsill.
- Use proper soil for your pepper plants. The best soils for the large pots should be rich in organic matter. Peppers are heavy feeders and will need a combination of fertilizer and compost to produce large and healthy fruits. Avoid regular garden soil, as it could compact around your plant’s roots.
- Your pepper plants will need to be 12 to 18 inches (30 to 46 cms) apart if you are planting multiples of them in one large pot or container. The seed depth should be at least a half-inch deeper than they were in the transition pot.
What Size of Containers or Pots Work Best for Pepper Plants?
Your seedlings should be four to six inches tall, and their root system is ready for large pots. A 1.5-gallon (5 liter) planter is a perfect size for the growing pepper plant. Larger pots can do, but they are unnecessary for most pepper plants.
A 1.5-gallon planter is easy to move to adjust for sunlight. Larger pots are excessively large for the capsicum plant, but you can use them if you are going to have more than one plant in each planter.
Pro tip: Your container should be a third of the height of the plant that you intend to plant in it. Measure your plant from the soil line to its tip.
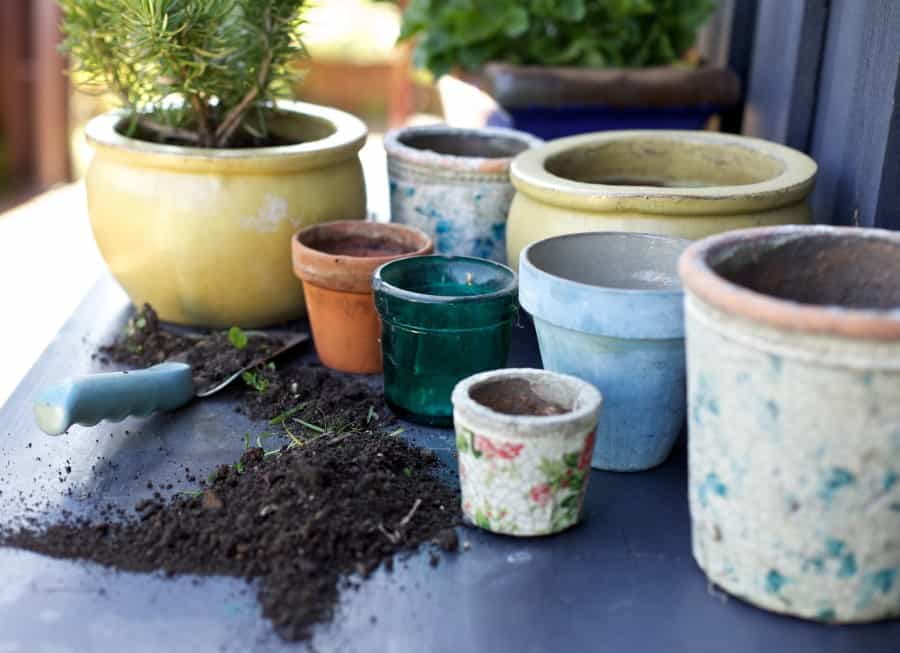
Best Type of Pot Material for Pepper Plants
The good news is that pepper plants are not picky, and they don’t need a specific type of pot to flourish, so you can use whatever pots you have on hand. We tend to use terracotta or plastic pots, as they are easy to move around. The most important factor when picking a pot for growing pepper plants is that they are well-draining.
Here are some of the most common pot materials available that you can use for pepper plants, with some pros and cons for each.
Terra Cotta Pots
Terra cotta has a beautiful earthy color, and you can get them in a variety of sizes and shapes. They will enhance the beauty of your flowers and plants. Terra cotta is a mix of porous iron-rich clay which gives them the advantage of wicking away excess wetness from the plants, which prevents root rot.
In hot months, they will help aerate your plant’s roots, keeping them cool. The major challenge with terracotta pots is their fragility. Hard frosts and falls will crack them. Should you not water your plants regularly, terra cotta will dry them up fast. Glazed terracotta pots will keep in moisture for longer.
Plastic Pots
Plastic containers are the go-to containers for gardeners that are not overly concerned by pot aesthetics. Plastic is cheap, durable, and easily portable that keep moisture well. Should you place your peppers in too hot areas, then use plastic containers with colors that reflect the heat to prevent overheating your plant’s roots.
Concrete Pots
Concrete containers are heavy and suitable for large plants such as trees and bushes. They are very insulating to the roots and protective of the plants. A concrete planter will survive winters outdoors, so they are a perfect for outdoor plants.
Wooden Pots
Wood planters are beautiful to look at in the garden. They are also lightweight and keep in moisture well. The best wood planters should be made from rot-resistant wood such as redwood or cedar. They should not warp, shrink, or expand, so the workmanship is key.

Can You Transplant Peppers from Containers into the Ground?
Yes, you can transplant pepper plants from containers and move them to an outdoor garden in the ground. The best transplanting time is in the evening, which gives the plant enough time to adjust to the outdoors before the sun is fully up. Bell peppers are a tad vulnerable to sun scalding and wilting after transplanting. Some peppers are more durable than Bell peppers, but it’s worth taking the necessary precautions to prevent long-term issues.
Make sure to provide shade if the sun is too strong. Water the surrounding soil but avoid watering the wilted leaves when resuscitating them. Don’t worry if some seedlings bend or break during transplanting. Most of them will straighten back up if you stake them.
As mentioned above, if you had been keeping your pepper plants indoors, make sure to harden them off before you move them outdoors permanently.
Prune away any broken branches. Take good care of your plants, and they will be ready to harvest in 100 to 150 days.
Closing Thoughts
There are many benefits of having pepper plants a constant in your indoor or outdoor garden. These vegetables are full of antioxidants and vitamins, and by growing your own, you will have a fresh steady supply of the freshest delicious peppers at your fingertips.
Here are Some of my Favorite Gardening Products and Tools
Thank you for reading this article. I hope you found it helpful for growing some new plants in your home or garden. Here are some products I like that I hope you’ll also find helpful. These are affiliate links, and I am compensated for referring traffic. But in all honesty, these are the exact product that I use or recommend to everyone.
Soil: For high-quality soil, I really like Fox Farm Ocean Forest. I do all my growing in containers and this soil has worked great for me. I like how they use nutrient-rich contents like earthworm castings, bat guano, and composted crab and fish.
Fertilizer: Currently I am using a seaweed-based organic fertilizer call Neptunes Harvest. This is a great milder fertilizer option if you want to use something organic. If you want a more powerful fertilizer, I recommend Fox Farm Liquid Nutrient Trio, lots of people have had great growing success with this product.
Pruning Shears: Pruning shears are one of the most useful gardening tools to have because it’s important to prune your plants to keep them healthy. The pruning shears I recommend are the Gonicc 8’’ pruning shears. I like them because they are built sturdy and work both on bigger and smaller plants, so you don’t need to have multiple pruning shears.
spicytrio.com is a participant in the Amazon Services LLC Associates Program, an affiliate advertising program designed to provide a means for sites to earn advertising fees by advertising and linking to Amazon.com. spicytrio.com also participates in affiliate programs with other sites. spicytrio.com is compensated for referring traffic and business to these companies.