
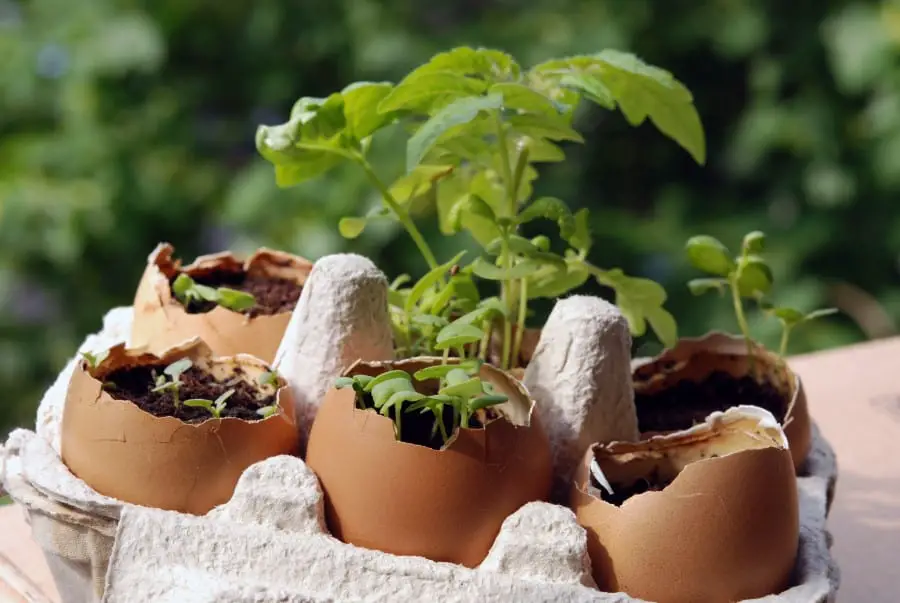
Germinating pepper seedlings can be a relatively simple and straightforward task when done properly and if you have the right setup for the job. Many experienced pepper growers recommend using egg cartons to get their seedlings started. So, how do you grow peppers in egg cartons?
To grow peppers in egg cartons, begin by poking 5 holes in each egg-shaped groove with a pin for drainage. Next, fill the grooves with seed starting soil, make an indentation with your pinky finger, and place a single seed in each spot. Bury the seeds and then water thoroughly to moisten the soil.
In this article, we’ll walk you through a comprehensive, step-by-step guide on how to grow peppers in an egg carton. Next, we will go over why egg cartons work so well for starting pepper seedlings and the benefits they offer. Finally, we will provide a timeline on how long pepper seedlings take to grow in egg cartons and how to safely transfer them into a pot when the time comes.

Step-by-Step Guide on Starting Peppers in Egg Cartons
Germinating pepper seeds in egg cartons requires very few materials and can yield incredible results when done properly. All that is required are your seeds, a toothpick or pin, some nutrient-rich soil, and a biodegradable cardboard egg carton.
While many people use slightly different versions of the egg carton method, the following guidelines are the most basic and effective.
To germinate pepper seedlings in an egg carton, follow these simple steps:
Poke Five Holes in Each Egg-Shaped Groove
The first thing you will need to do to prepare the egg carton is to open it up and poke five holes in each egg-shaped groove using a pin or toothpick. Poke one hole in the center and the other four in each corner.
This helps water flow out and will prevent the soil from becoming excessively humid and oversaturated.
Fill Each Egg Groove with Soil
Now that you have prepared your egg cartons for adequate drainage, begin filling each of the cups with soil until it is level with the top of the groove.
While you could use basic soil, provided that it is rich, it is recommended that you use a specifically formulated germination soil. Our recommendation for the best germination soil is Miracle-Gro’s Seed Starting Potting Mix.
Make a Hole in the Dirt
Next, using your pinky finger, press into the center of the soil, making a hole in the dirt of about 1-inch deep.
Place your seed in the hole and fill it back in with dirt so that it is completely buried.
Note: It is optional whether or not you want to place your seeds directly into the soil or if you would rather pre-soak them in water beforehand. Although some prefer to soak seeds in water for about 12 hours before placing them into the dirt, others may choose to bypass this step, which is also acceptable.
Pre-soaking your seeds in water will help speed up the germination process, but oversoaking will drown them and render them useless, so never exceed 12 hours of soak time.
Water the Soil
Now that you have planted your seeds in the egg cartons, immediately water the soil.
You want to water them adequately so that the soil is moist, but you do not want to overwater them to the point where the dirt becomes saturated or muddy.
Close the lid up and let them sit, rewatering them every day or two, or as often as you observe to be necessary. Closing the lid allows more humidity to accumulate and can speed up germination.
Because of the egg carton’s cardboard paper material, there may be a tendency for it to soak up some of the moisture from your soil and leave the seedlings dry, so watch out for this and be careful.
You may also benefit from slightly wetting the egg carton itself. This may create a moistened environment inside the container, which is particularly advantageous for procuring your seedlings to sprout.
Benefits of Using an Egg Carton to Start Your Pepper Plants
There are many advantages to starting pepper seedlings in an egg carton.
At first glance, it almost appears as if egg cartons were designed specifically for the task of germinating seeds.
The rows are organized, each carton typically has a dozen egg cups, and the grooves are the perfect depth for starting seeds.
Another reason why egg cartons are particularly beneficial for starting pepper seeds is that they are mobile and easy to move from indoor to outdoor.
The lid can provide shade and hold moisture inside, which is important during the pepper plant’s germination stage.
Egg cartons are also eco-friendly and biodegradable, assuming that you are using the cardboard-style cartons, which are the only type we recommend for germination.
Perhaps the greatest benefit of using an egg carton to start pepper seeds, which we will expand on in the next section of this article, is how easy the seed can be transferred from the carton to a bigger pot when the time comes.
At What Point Should You Transfer Your Peppers from the Egg Carton?
Those who generally have never germinated pepper seeds in an egg carton and those who are new to the process of starting seeds will naturally wonder how long you can grow pepper seeds in an egg carton before it is time to transfer them to a permanent pot, raised bed, or garden.
While the times will vary on a case-by-case basis, if you have followed the steps above accordingly and done everything right, your pepper plant seeds should begin to germinate within two weeks.
The surest way to tell that your seedlings are sufficiently grown enough to be transplanted into a larger pot is to visually observe them.
After one to two weeks in the egg carton, a stem should begin to emerge from the surface of the soil.
You do not want to immediately transfer your peppers to a pot at the very first appearance of a stem. You also do not want to wait too long either, as doing so will make it increasingly difficult for the more developed root to be transferred without shocking or killing it.
Once you see the stem begin to develop and strengthen a little bit above the surface of the soil, you are ready to transplant it to a pot.
How To Transfer a Pepper Plant From an Egg Carton to a Pot
While the process of transplanting a seed from an egg carton to a pot is fairly easy, great care must be taken during this stage so as not to injure or damage the root.
Seedlings are very frail and vulnerable when they first begin to root, so handle them delicately.
Your pot should be prepared ahead of time by filling it with nutrient-rich soil and digging out a small hole where the pepper plant, along with dirt that has clung to its roots, will sit.
With a sharp pair of scissors, cut each individual soil cup out of your egg carton.
Next, gently and carefully begin to rip, tear, and peel away the paper egg carton. Using a razor blade will help but be cautious not to sever any of the roots.
In some instances, you may even find that the roots of your pepper seed have begun to find their way through the drainage holes in the bottom of the carton.
Continue to peel away until you have freed the soil and the roots contained therein from the egg carton. Inside you will likely find a dense cluster of roots, depending on how long you have allowed it to develop inside the egg carton.
You do not need to remove every last piece of the carton, but it must not be impeding the roots in any way.
Place your pepper in the new pot with the stem remaining above the surface and water it nicely.
Watering immediately after transferring your pepper will encourage its roots to spread and grow out into the larger pot.
Closing Thoughts
In this article, we sought to explain the process of starting your pepper plants in egg cartons.
Using egg cartons to germinate pepper seedlings begins by poking holes in the bottom of each egg groove bowl, which allows water to flow out and aids in drainage.
From there you will fill in the grooves with your soil, poke an indentation in the middle of each one, and place your seeds in. Cover the seed with soil and immediately water them.
If everything works out properly, you can expect your seeds to begin rooting within a week or two.
Here are Some of my Favorite Gardening Products and Tools
Thank you for reading this article. I hope you found it helpful for growing some new plants in your home or garden. Here are some products I like that I hope you’ll also find helpful. These are affiliate links, and I am compensated for referring traffic. But in all honesty, these are the exact product that I use or recommend to everyone.
Soil: For high-quality soil, I really like Fox Farm Ocean Forest. I do all my growing in containers and this soil has worked great for me. I like how they use nutrient-rich contents like earthworm castings, bat guano, and composted crab and fish.
Fertilizer: Currently I am using a seaweed-based organic fertilizer call Neptunes Harvest. This is a great milder fertilizer option if you want to use something organic. If you want a more powerful fertilizer, I recommend Fox Farm Liquid Nutrient Trio, lots of people have had great growing success with this product.
Pruning Shears: Pruning shears are one of the most useful gardening tools to have because it’s important to prune your plants to keep them healthy. The pruning shears I recommend are the Gonicc 8’’ pruning shears. I like them because they are built sturdy and work both on bigger and smaller plants, so you don’t need to have multiple pruning shears.
spicytrio.com is a participant in the Amazon Services LLC Associates Program, an affiliate advertising program designed to provide a means for sites to earn advertising fees by advertising and linking to Amazon.com. spicytrio.com also participates in affiliate programs with other sites. spicytrio.com is compensated for referring traffic and business to these companies.