
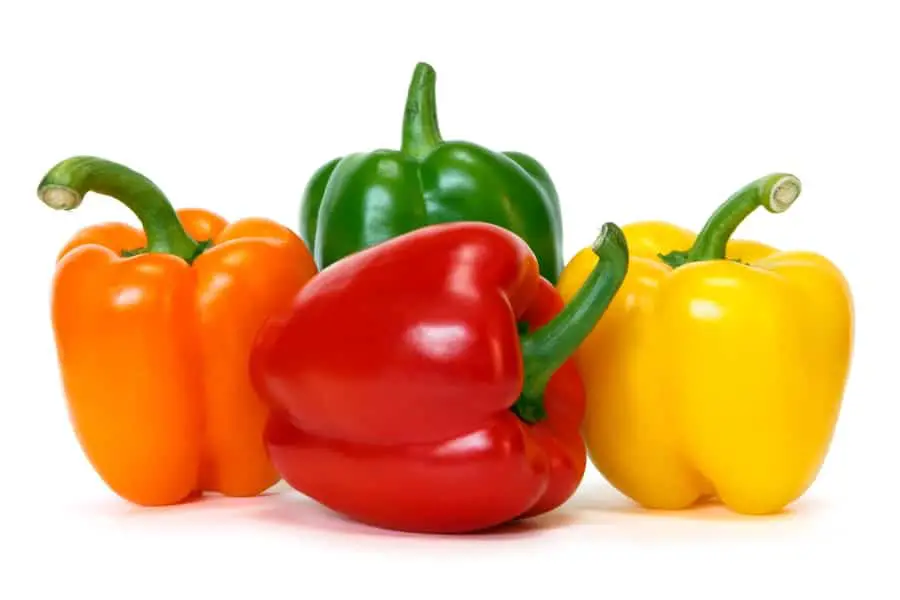
We all know that peppers are a great way to spice up your meals but having too many could seem like a bit of a problem. Whether your pepper plant has just yielded a bumper crop, or you bought a bulk-size bag of peppers at the grocery store, you should never let your extras go to waste!
If you have too many peppers, you can freeze, pickle, or can them to add years to their shelf lives or smoke them for 2-4 hours to bring out extra flavors. You could also make pepper flakes, spicy chili oil, or pepper pastes.
In this post we will show you that having too many peppers should never be seen as a problem! We will get into some of the best ways to preserve extra peppers, so that they don’t have to go to waste, and you can enjoy them in different forms.

Freeze Your Extra Peppers
Freezing your fresh peppers is a great way to preserve them whole or in slices. Freezing peppers will maintain your peppers’ taste and texture, which means that you can have fresh-tasting peppers all year round. When you want to use them, all you need to do is thaw them out and add them to your favorite dish.
To freeze your peppers, you may need to prepare them differently depending on the variety. Peppers with higher water content—usually the sweeter pepper varieties like Bell peppers—should be de-stemmed and de-seeded before freezing.
If you are freezing Bell peppers, cut around the stem, remove the seeds, and then put your peppers in freezer bags or containers that can be safely kept in the freezer.
Hotter and smaller peppers—such as Jalapeños, Serranos, Habaneros, and Cayennes— usually freeze well without being de-seeded. If you are preserving hot peppers or more rigid varieties, all you need to do is put them in a freezer container or bag.
Frozen peppers usually last around one year, but this depends on the condition that you store them in. Peppers stored at consistent low temperatures last longer.
You can tell if your peppers are no longer good if they have freezer burn or have discolored patches on their skin. Still, even if they do not look good, they are edible as long as they have been kept frozen, but their texture and taste may have changed.
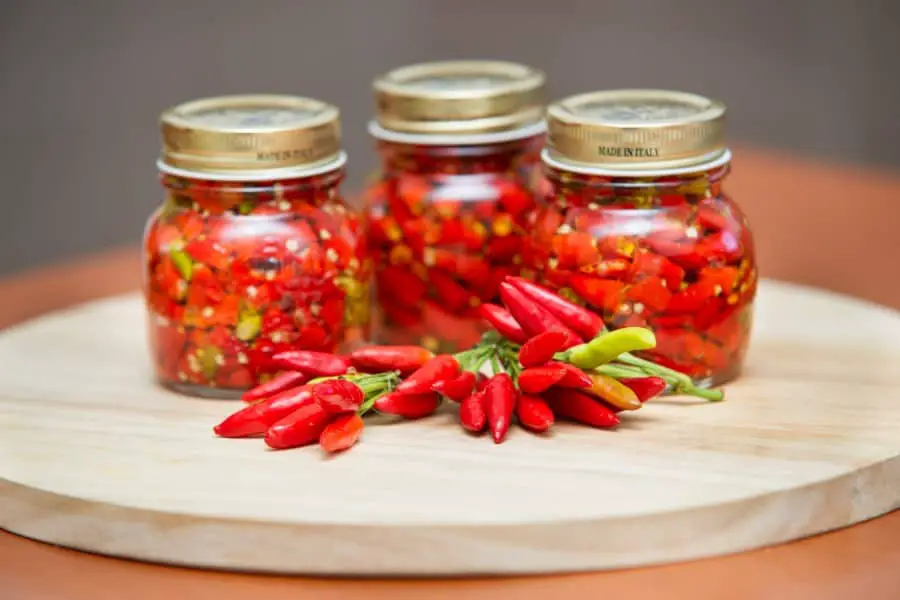
Pickle Your Peppers
Pickling peppers is one of the best ways to preserve peppers because pickled peppers usually last around two years. Pickling also makes your peppers taste a bit milder and sweeter, and it brings out the green, fresh taste in many varieties. Pickled peppers taste great in salsa, on sandwiches, in many different dishes, and as a stand-alone snack.
Pickling peppers is very simple, and anyone can do it. To pickle your peppers, you will need:
- ½ lb (226.7 grams) of peppers
- Canning jars with metal lids or a large pickle jar—28 oz (1.75 pints)
- 1 cup white or apple cider vinegar
- 1 cup water
- 2 cloves of garlic
- 1 teaspoon salt
- A saucepan or pot
To pickle your peppers:
- Slice the peppers. If you are working with hot peppers such as jalapenos, you may want to wear gloves during this step. Cut your peppers into thin slices with a paring knife and remove the seeds and membranes for milder tasting peppers.
- Dice your garlic. Next, you should slice your garlic into tiny chunks or use a garlic press to crush it.
- Place your peppers and garlic into jars. For this recipe, you will need at least 28 ounces (1.75 pints) of jar space. You can use a large pickle jar or multiple canning jars.
- Boil the wet ingredients. In your saucepan or pot, combine the water, vinegar, and salt. Turn up the heat and allow the mixture to come to a boil.
- Pour the wet ingredients into your jar(s). Once your mixture starts to boil, remove it from the heat, and pour it into your jar(s) over the peppers and garlic. After you have finished pouring, poke down the peppers with a butter knife to remove bubbles.
- Allow the jars to cool. Allow the jars to cool with their lids off for at least a few hours until the peppers are at room temperature. Once the peppers have cooled, put the caps on and put them in the fridge.
You can check out this complete pepper pickling guide for more detailed instructions and tips.
Can Your Peppers
If you want to keep your peppers tasting fresh and spicy all year round, you might consider canning them. Canning peppers is an excellent way to improve their shelf lives for many years. However, canned peppers are usually at their best quality for the first year after processing them.
You will need:
- Peppers
- Vinegar (white wine or apple cider)
- Salt (optional)
- Jars
- A pot or saucepan
- A pressure cooker
To can your peppers:
- Wash and cut your peppers. First, thoroughly wash your peppers and cut them into thin slices, removing the stems and the seeds.
- Blanch your peppers. Place your peppers in boiling water in a saucepan or pot and allow it to simmer for three minutes. After blanching, you will want to remove the peppers’ skins because, once they are canned, the skins become tough and unpleasant to eat.
- Put your peppers into your jars. With a slotted spoon, remove the peppers from the boiling water and pack them into your jars, leaving at least 1 inch (3 cms) of space at the top.
- Add vinegar. For every 1 pint (½ liter), add one tablespoon of vinegar to each jar. If you want your peppers to keep longer, add a pinch of salt to each jar.
- Fill the jars with water. Next, pour boiling water into your jars, leaving at least 1 inch (3 cms) space, then place the lids on them.
- Pressure cook. Once your lids are on your jars, cook them for 35 minutes in a pressure cooker. You will need to set the pressure at 10 lbs (60 kPa) on a weighted gauge cooker or 11 lbs (76 kPa) pressure in a dial gauge pressure cooker.
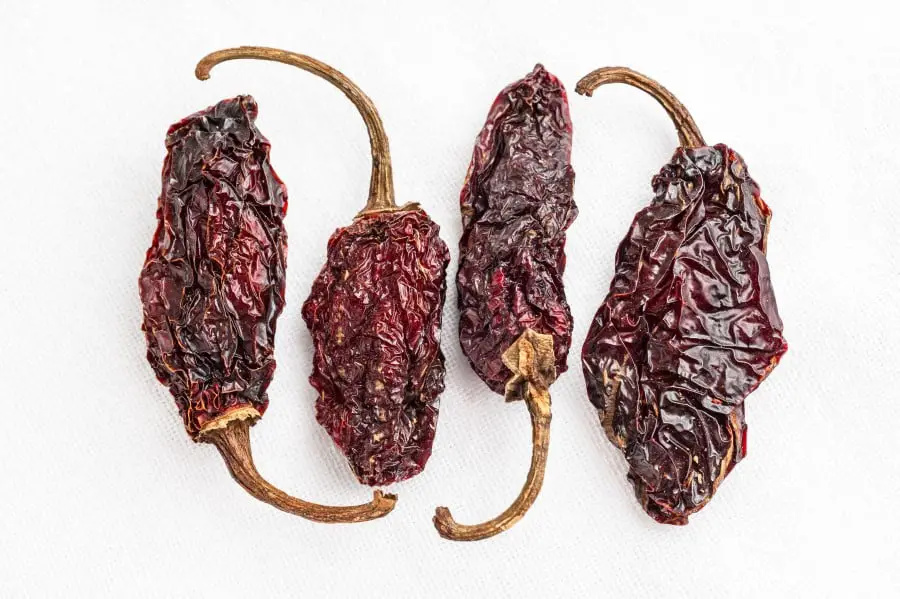
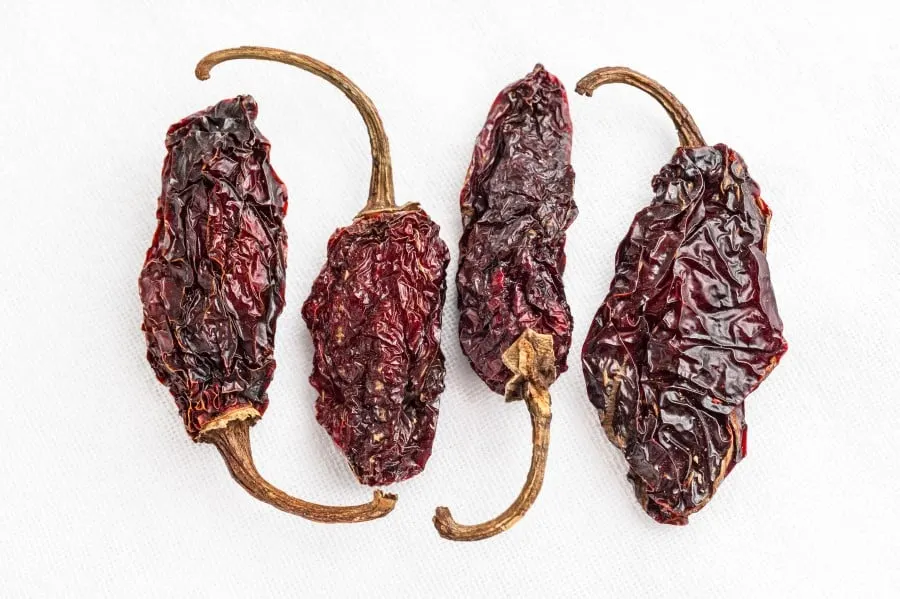
Dehydrate Your Peppers
Dehydrating your peppers is a great way to make them last for many years. Dehydrated peppers can be used as seasonings in dishes and other homemade spice blends, and they can add flavor to any dish. To dehydrate your extra peppers, you can either use a dehydrator or an oven, and you won’t need any special tools. To get started:
- Prepare your peppers. Wash your fresh peppers thoroughly and dry them out on a paper towel. You do not have to remove the stems or seeds, but if you want your peppers to taste milder, now is a good time to remove the seeds.
- Dehydrate your peppers. Place your peppers in a dehydrator or an oven with the door slightly cracked to allow moisture to escape at 150 degrees Fahrenheit (65.6 degrees Celsius). You may want to open a window to keep the spice from burning your nose if you are working with spicy peppers. Depending on what kind of oven you have and the type and the size of the peppers, oven drying can take anywhere from 12 hours to as long as four days. You should check on the peppers every 30 minutes to make sure that they’re not burning. Most peppers take on a deeper shade when they dry but keep an eye out that they don’t burn too far.
- Allow to cool and package. Once your peppers are dehydrated and thoroughly cooled, you can put them in a plastic container, zip-top bag, or jar to keep them fresh. Store them in a dark, dry place until consumption.
If you’re interested in this method, we recommend checking out our complete guide on four pro methods to dehydrate peppers.
Smoke Your Peppers
Smoking peppers brings out plenty of extra flavor in them, and it can sweeten them significantly without sacrificing their signature spice. Smoked peppers make an excellent seasoning for meats, stews, and pasta since they add a pleasant, subtle smoky flavor to whatever they come into contact with.
Depending on your peppers’ size and thickness, it can take two to four hours to smoke your peppers. To smoke peppers, you will need:
- Peppers
- A smoker or grill
- Smoking wood such as hickory, mesquite, pecan, or applewood
Once you have all of your materials together, it is time to get smoking.
- Prepare your peppers. Clean your peppers thoroughly. You may also want to slice your peppers now. Chopped peppers usually taste sweeter than whole peppers and cutting them up will allow you to remove the seeds. Sliced peppers also cook much faster than whole peppers.
- Start your grill or smoker. Warm up your grill or smoker using charcoal or wood until the temperature is around 150 degrees Fahrenheit (65.6 degrees Celsius). Ensure that there are no flames, just embers.
- Add your smoking wood. Next, add your smoking wood to the grill or smoker. Different woods will have different flavored smoke, and some are better for certain dishes than others. For example, pecan is the traditional smoking wood for Mexican dishes, and hickory is one of the best smoking woods for steak. Once you add the wood, do not allow flames to form.
- Add your peppers. Once your wood is smoking, it is time to add your peppers to the smoker or grill. The goal is to smoke them at a low temperature for an extended amount of time, so do not allow the heat to get too high, and if flames start to form, break them up.
- Turn your peppers periodically. As your peppers cook, it is a good idea to rotate them every 20 or 30 minutes. Checking on your peppers will also allow you to monitor the temperature and keep the heat going. If the embers die out, add more charcoal or smoking wood. Again, make sure that flames do not form.
- Dehydrate your peppers. Even if you have smoked your peppers well, there could be moisture trapped inside that will cause them to go bad before long. Put your peppers in a warm, dry place with a towel beneath them, or place them in the oven at 150 degrees Fahrenheit (65.6 degrees Celsius) with the door cracked open. Allow them to dehydrate for at least four hours.
- Store your peppers. After your peppers are smoked and dehydrated, you can keep them whole or grind them up to use as a spice. If you don’t want to grind them, you can put them in a freezer bag and store them in the fridge for a month or freeze them for three months.
Roast Your Peppers
If you have a lot of peppers, you might want to consider roasting them, a great way to spice up your dishes. Depending on how you store them, roasted peppers could last up to three months, making roasting a logical way to preserve lots of peppers.
To roast your peppers, all you need are peppers, a baking sheet, and some olive oil. If you want to preserve them afterward, you will need salt, pepper, and a bit more olive oil. You can roast peppers in an oven or a grill. This recipe does not require anything special, so it is something that anyone can do. To roast your peppers:
- Prepare your peppers. Wash your peppers, and either cut them in half and de-seed them or leave them whole. If you leave your peppers whole, they may not last as long as their sliced counterparts, so you should keep that in mind when deciding how to store them.
- Preheat your grill or oven. If you are using an oven, cook the peppers at 475 degrees Fahrenheit (246 degrees Celsius) for 45 minutes or until they are soft and charred. If using a grill, place your peppers over a low flame on a grill, turning them every 20 minutes or so until all sides are nicely charred. You can also roast peppers on a non-electric stove top, by turning over in the open flame.
- Allow the peppers to cool, and you’re done.
Roasted peppers usually only remain fresh for five or six days in the fridge. If you want your roasted peppers to last longer, you might consider coating them in olive oil, pepper, and salt. Doing this will make the peppers last around two weeks in the fridge. You can also freeze roasted peppers in a freezer bag or container, making them last at least three months.
Make Pepper Flakes out of Your Extra Peppers
Pepper flakes are super easy to make and even easier to use. Pepper flakes make an excellent spice for everyday cooking, and their easy-to-dispense format makes them a popular kitchen spice for every kind of dish. Believe it or not, pepper flakes are also easy to make at home, and they can be a great way to preserve your extra peppers.
If you want to make pepper flakes at home, all you need to do is dehydrate your peppers following the steps above and grind them in a mortar and pestle or food processor. One word of caution, though: when handling hot peppers, you should always use gloves since the capsaicin in the peppers can burn your hands. After you have crushed your peppers, put them in a bag, jar, or old spice container. If stored correctly in an airtight container, crushed pepper flakes can last up to three years.

Spicy Chili Oil
Chili oil is a classic ingredient used in Chinese rice and noodle dishes. It is an excellent condiment for eggs, rice, dips, stir-fries, and much more. To make your chili oil at home, you will need:
- 1 cup of chili flakes
- 2 cups of neutral-flavor oil like canola, sesame, peanut, or soybean oil
- 1 cinnamon stick
- 5 star anises
- 2 bay leaves
- 3 cloves of garlic
- 1-2 teaspoons of salt
- A pot
Once you have all of your ingredients, it is time to get cooking.
- Prepare your oil. In a large pot, combine your oil with your bay leaves, cinnamon, garlic, and the star anise. Place the pot over medium heat and allow it to hover between 200 and 225 degrees Fahrenheit (93 to 107 degrees Celsius). Do not let the oil’s temperature get above 225 degrees Fahrenheit (107 degrees Celsius), or else it could burn and spoil the whole batch.
- Let the oil simmer. Allow the oil to simmer for at least 30 minutes. But for the best results, allow the oil to simmer for an hour.
- Turn off the heat and remove the spices. Once you are done simmering, remove the pot from its heating source and use a slotted spoon, tongs, or a frying basket to remove the spices from the hot oil. You can use these spices for other things, especially the garlic, so don’t throw them out.
- Pour the oil over your chili flakes. Once the spices are removed, pour the oil over your chili flakes, with extreme care so as not to splash or spill the hot oil on yourself.
- Stir in the salt. After you have poured your oil, stir in your salt to the oil and chili flakes, ensuring to mix everything well.
- Allow it to cool. Allow your chili oil to cool for at least six hours before putting it in an airtight container for storage. Now, your chili oil should last at least six months when stored in the refrigerator.
Spicy Pepper Jelly
Pepper jelly is another excellent way to preserve your extra peppers, and it lasts a very long time in the fridge. To make pepper jelly, you will need:
- 4-6 spicy peppers
- 2-3 sweet peppers such as bell peppers
- 1 ½ cups of apple cider vinegar
- 2 ½ cups of sugar
- 2 teaspoons of Pomona Pectin
- A pressure cooker or canning pot
- Canning jars with metal lids
To start your pepper jelly:
- Prepare your supplies and peppers. First, you should boil your jars and lids in the canning pot or pressure cooker to thoroughly sterilize them. Leave the jars inside the canning pot while you wash and finely chop your peppers.
- Cook your peppers. In a medium pot or saucepan, combine your chopped peppers and vinegar, and allow the pot to come to a boil. Allow the vinegar to simmer for 10 minutes.
- Mix in pectin and sugar. Add two tablespoons of water, pectin, and sugar to your vinegar and peppers, and raise the heat to high to allow the pot to rise to a roaring boil. Stir as the temperature increases until the sugar and pectin have fully dissolved.
- Pour jelly into jars. Once the pectin and sugar are dissolved, use a spoon or funnel to pour the jelly into jars. After you are done pouring, place the lids onto the jars.
- Seal the jars. Bring the water bath in the canning cooker to a boil and allow it to boil for 10 minutes. Then turn off the heat and let the jars slowly cool. Now, you are done with your homemade pepper jelly!
Pepper Pastes
Pepper paste is another great additive for your dishes, and it makes a fantastic hot-sauce-like seasoning that is very versatile. To make your very own pepper paste:
- Prepare your peppers. Wash your peppers, and cut them in half, removing the stems and seeds. Next, lay your peppers on a baking sheet with a towel underneath, and sprinkle salt over them. Allow all the moisture to be wicked away by the salt and towel. Usually, this process will take around two hours.
- Peel your peppers. If you do not remove the skins from your peppers, they will be hard, messing up your pepper paste’s texture. To soften the peels, roast your peppers in the oven at 240 degrees Fahrenheit (115 degrees Celsius) for around 30 minutes. Allow the peppers to cool, then remove the skins.
- Puree your peppers. Once the skins are off the peppers, use a food processor or stick blender to puree the peppers until they form a thick paste.
- Allow to cool and season to taste. After your puree is cool, you can add salt, garlic powder, or other spices to your pepper paste to make it more flavorful.
- Store. You can put your pepper paste in jars or freeze it in an ice cube tray to make seasoning cubes.
Pepper Salt
If you want to make pepper salt to add spice to all of your dishes, it is easy as pie. All you have to do is follow the instructions for dehydrating your peppers and crush them up in a mortar and pestle, coffee grinder, or food processor after they are dry.
After you have ground your peppers, add salt to the powder. Usually, adding four tablespoons of salt for every one tablespoon of pepper flakes should make for a nicely balanced seasoning.
Closing Thoughts
There are so many ways to use your extra peppers, so you should never have to throw any out. Peppers can be used for jellies, seasoning powders, pastes, and pickles, making them highly versatile and valuable to have in your kitchen.
Next time you get an abundant harvest of peppers, or end buying too many at the store, you should remember that it’s not a problem as there are many ways to increase their shelf lives without them going to waste!